
Tilt-shift is the name of a visual effect for both videos and photos that has recently become quite popular. The tilt-shift effect uses blurring and color saturation to make a real life scene look like a miniature model diorama. While creating tilt-shift videos like this one can take a while, applying this same effect to your pictures is much easier. Simply open up Photoshop and follow these simple steps:
1. Open the image you’re going to work with. Note that not all photos are suitable for the tilt-shift effect. You’ll obtain the best results with top perspective images: the street seen from a skyscraper, a landscape taken from an elevated viewpoint, etc. In my tutorial, I’ll use this shot from Stock.xchng.

2. Change to Quick Mask mode by hitting the Q key or clicking on the marked button below the foreground and background colors. Then select the Gradient tool, making sure you choose the Reflected Gradient type.
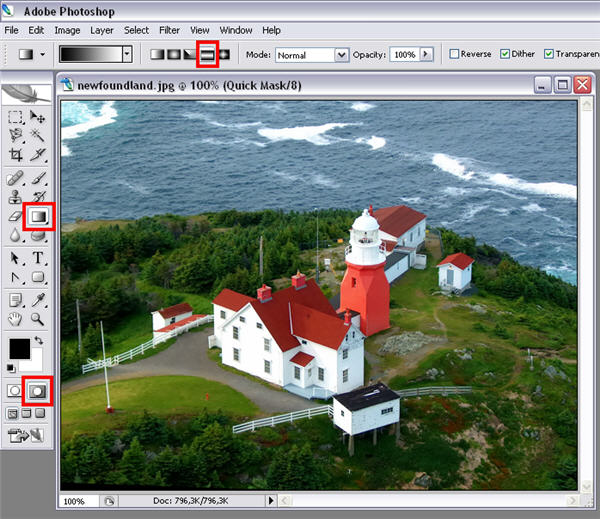
3. Apply the gradient to the photo with a vertical line. This line should start in the center of the in-focus area, and finish where the transition to the area out of focus ends. You can also continue up to the top of the image if you want. As soon as you release the mouse button, you’ll see a reddish layer on top of the image.

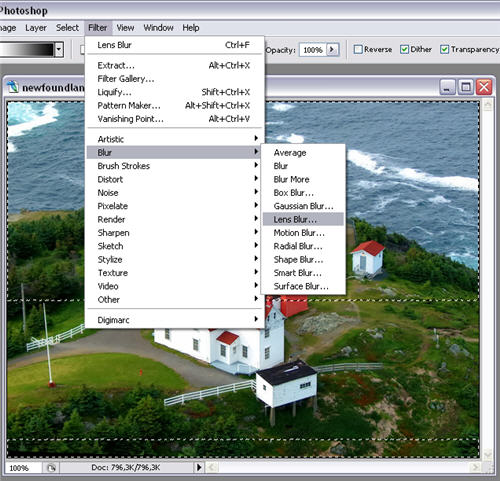
4. Switch back to Normal Mode (the button beside the Quick Mask mode one) and the reddish area will now be selected. Now go to Filter > Blur > Lens blur. Here comes the fun part!
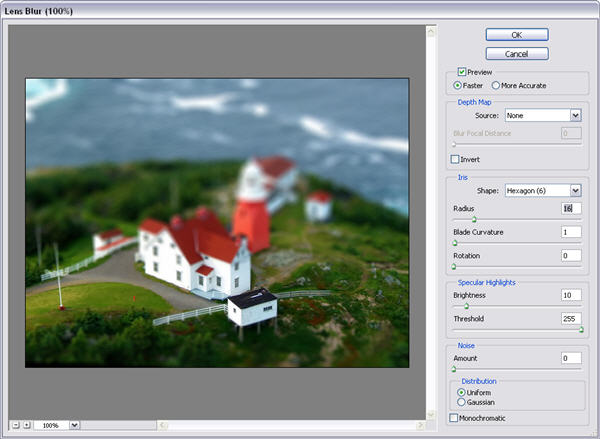
5. The Lens blur filter achieves a very attractive effect even with the default settings. But don’t hesitate to play with sliders and values until you obtain a really eye-catching result.
6. After applying the Lens blur filter you can already deselect the areas in your photo (Ctrl+D). Then go to Image > Adjustments > Hue/saturation (Ctrl+M) and boost up the saturation value to give your image a more plastic-like look.

7. Finally go to Image > Adjustments > Curves (Ctrl+M) and apply a bit more contrast to the image.
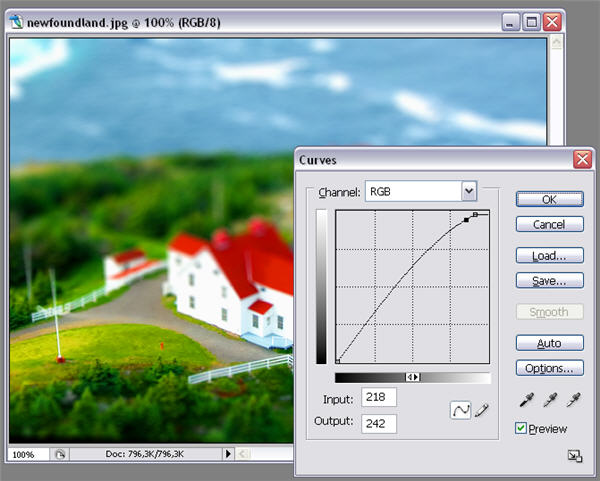
8. Your tilt-shift effect is ready!

