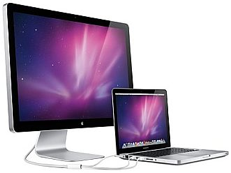
 Using an external monitor with your Macbook is beneficial in many ways. Firstly, it’s much easier on your eyes to use a bigger display than a Macbook screen. Secondly, it makes it much easier to spread-out your work and organize your desktop. Thirdly, if you are video editing or need a large working space, an external monitor expands your screen estate. Finally, it can extend the lifetime of your Macbook monitor because you can work with your Macbook closed.
Note that Macbooks are designed for use with DVI monitors but you can connect a VGA monitor by using a Mini-DVI to VGA Adapter cable.
However, when you attach an external monitor, you might find that the colors and resolution are a bit amiss. Fortunately, OS X has a very simple to use calibration tool which makes sure you are getting the best out of your external monitor.
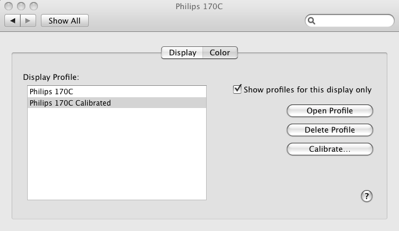
To open the screen calibration tool go to your System Preferences and select Display.
Select the Color tab and then Calibrate:
The calibration wizard then takes you through a series of configuration tests. The first step is to ensure that your contrast and brightness settings are set to their highest levels on your monitor:

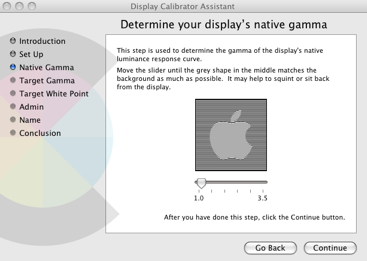
Next you have to adjust Native Gamma Settings:
Then Target Gamma Settings:

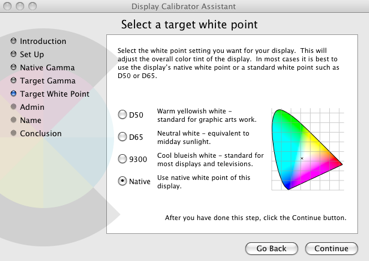
Lastly, you need to set a Target White Point which for most people, is best left as Default:
Finally, give your configuration settings a name in case you disconnect the monitor and use it at a later date.
For most people, this monitor calibration tool in OS X will be sufficient. However, if you’re a graphic designer or have a particularly keen eye for detail you might like to try SuperCal which gives you a much higher degree of control over calibration.