Every time you insert a CD or plug a USB device into your computer, you see this window menu that enables you to choose the task you want to perform with the data stored in that removable drive:

However, some people may find it more annoying than handy, because it usually takes a while to load whereas you would go faster just by choosing what to do on your own. So if you’re one of those people who don’t like the autoplay menu, today we’re going to show you how to disable it so that it doesn’t appear anymore when you insert a CD or a USB device.
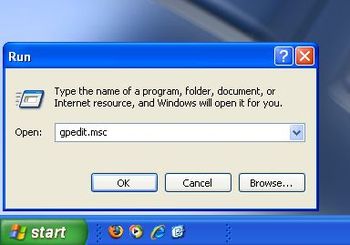
First click on the Start button, choose Run and open gpedit.msc
This launches the Group Policy editor, which will allow us to tweak some system settings according to each group of users and their rights. Click on Administrative templates, then on System, and then, on the right side pane, look for an option called “Turn off autoplay”

Double click on it and set the “Turn autoplay off on” to “All drives”.

Now you won’t see that Autoplay window ever again. Of course, if you miss it at some point, simply follow these steps to activate autoplay again.
But if what you want to do is customizing that autoplay window, then Autoplay Repair is what you’re looking for. This neat tool enables you to change autoplay settings and make it display shortcuts to your most frequently applications, so that it becomes a really useful menu instead of just a naggy window.