![]() I recently transfered all of my family’s home movies onto one DVD using iMovie and iDVD. The problem was this involved years of film which added up to 60GB of DV footage in iMovie. Even when edited, the final edited footage came to almost 8GB – way too much to fit on a normal DVD.
I recently transfered all of my family’s home movies onto one DVD using iMovie and iDVD. The problem was this involved years of film which added up to 60GB of DV footage in iMovie. Even when edited, the final edited footage came to almost 8GB – way too much to fit on a normal DVD.
Blank Single Layer (SL) DVDs can only hold 4.7GB of data so I had a big problem. To split the film in iMovie and re-export it to iDVD would have taken absolutely ages. My only option was to buy a blank Double Layer (DL) DVD which annoyingly, are only sold in packs around where I live. So I ended up paying almost $20 just to use one disc. The problems didn’t stop there either. In fact, they only just began so here’s a few tips that I hope might be able to help you if you’ve found yourself in the same situation.
![]() Check DVD Player compatibility – For some strange reason, many DVD players can’t even play DVD Double Layer disks and this includes new players too. If you’re burning your project as a gift like I was, make sure you find out whether the recipients DVD player can play DL discs.
Check DVD Player compatibility – For some strange reason, many DVD players can’t even play DVD Double Layer disks and this includes new players too. If you’re burning your project as a gift like I was, make sure you find out whether the recipients DVD player can play DL discs.
 Clear some hard drive space – To export a project such as mine to iDVD required around 15GB of free hard drive space to work. In addition, iDVD required another 15GB to burn the movie. When you do finally come to the point where you burn your movie, iDVD will warn you how much disk space it needs to burn.
![]() Burn at a slow speed – After about 7 hours of rendering the project for burning, iDVD informed me that there had been a “Multiplexer Error” during formatting and the project was unable to burn. A Google search revealed that many other users had experienced the same problem but explanations varied from lack of hard disk space to dodgy DVDs.
Burn at a slow speed – After about 7 hours of rendering the project for burning, iDVD informed me that there had been a “Multiplexer Error” during formatting and the project was unable to burn. A Google search revealed that many other users had experienced the same problem but explanations varied from lack of hard disk space to dodgy DVDs.
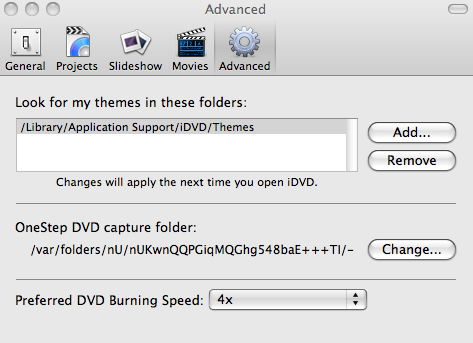
I finally discovered that the problem is solved simply by burning at a slower speed. in iDVDs advanced preferences, de-select the option “Burn at maximum speed” and select one of the lower ones (4x speed worked for me).
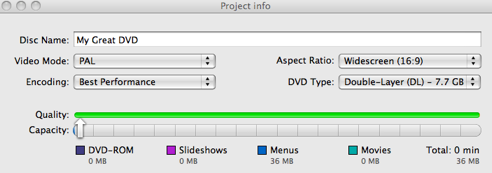
 Lower the encoding quality in iDVD – There are three rather confusing encoding settings in iDVD’s “Project Info” settings – Best Performance, High Quality and Professional Quality. It seems that Best Performance takes up the most disk space, while High Quality and Professional Quality take up a few gigabytes less. By changing to High Quality or Professional, you may be able to fit a large movie onto a Single Layer disk.
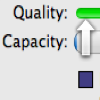
The colored bar indicates the final output quality – the more green the better basically. If the bar is coloured red towards the end, it may mean that the quality of your movie is degraded.
 Go make a big cup of tea – Or make that several cups because your project is going to take a lot of time to render and burn. Mine took around 9 hours and that was just under 8GB. This consumes a huge amount of processing power too so it’s best not use your Mac during this time if you can help it.

