Sometimes the most eye-catching photo effects are also the easiest to apply. Creating a warping effect on your pictures in Photoshop is relatively easy and, at the same time, it gives your photos a completely new appearance. Want to learn how? Follow these easy steps and see for yourself:
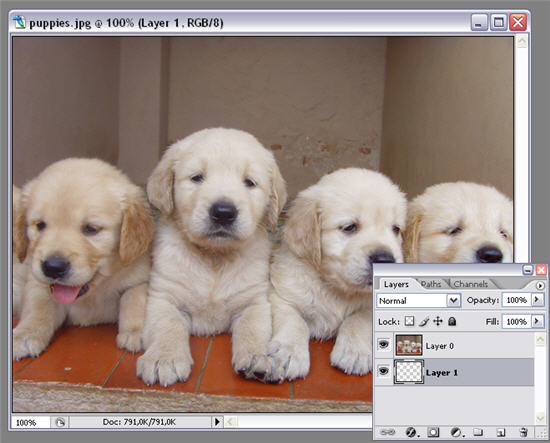
1. Open the photo you want to work with and unblock the background layer by double clicking on it. Then create another layer under this one.
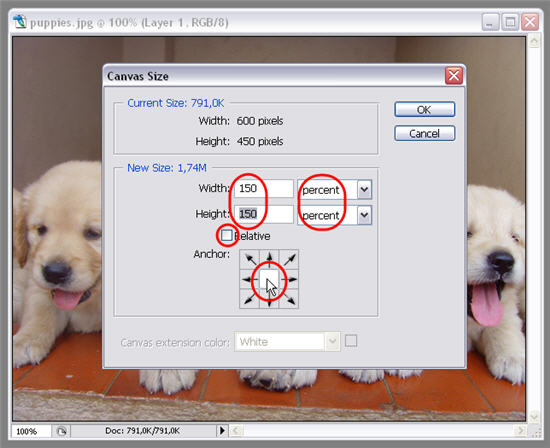
2. With the new layer selected, go to Image > Canvas size and enlarge the size of the canvas with the following settings:
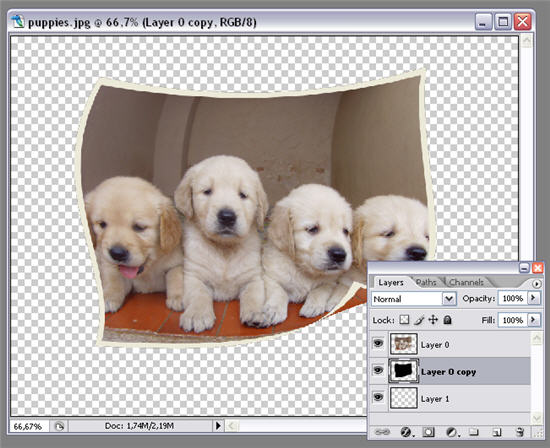
3. Select Layer 0 and add a stroke effect to the image in Edit > Stroke. Choose any color you like and place it inside the image.

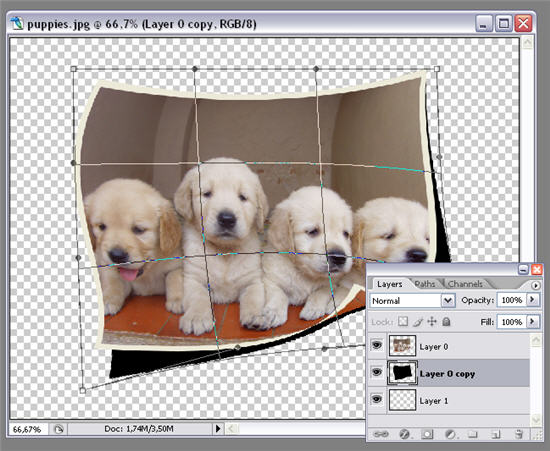
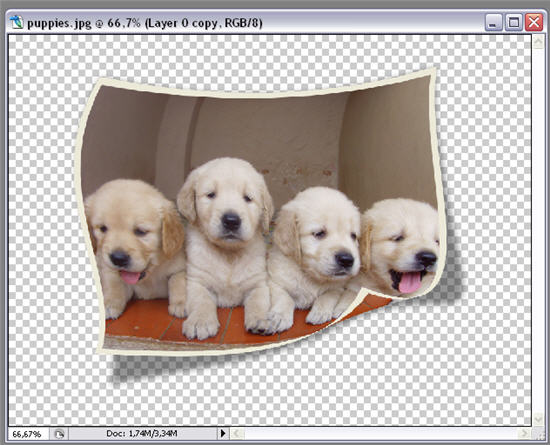
4. Now it’s time for some action. Go to Edit > Transform > Warp and start playing with the warping tool. It’s as easy as clicking anywhere on the image and dragging your mouse over the screen to see the effect. Try some different movements and combinations until you like the result, and then hit Enter to apply the effect.

5. Let’s apply a shadow to our photo. Duplicate the warped image and press Shift+Alt+Backspace to fill it with black (make sure it’s your foreground color).
6. Use the same tool from step 4 to warp this shadow too, and make it fit the image. Then go to Filter > Blur > Gaussian blur to make shadow edges smoother.
7. Lower the opacity of the layer and you’ll get something similar to this:
8. Finally, let’s add some shadows and highlights to achieve a more realistic result. Create a new layer on top of the others, change its blending mode to Hard Light and lower its opacity to around 15%. Create a selection around Layer 0 (Ctrl+click on the layer’s thumbnail) to avoid painting outside the photo area. Then use a soft brush to paint with black on the areas you want shadow, and with white on the areas you want to highlight.

9. Your warping effect is finished!