![]() If there’s one thing that Macs surely win hands down on nowadays, it’s video editing. There was a time when PCs didn’t even come close although specs have improved so much that now many PCs are more powerful in terms of hardware than Macs. However, when it comes to the editing process itself, Macs simply can’t be beaten, especially for beginners.
If there’s one thing that Macs surely win hands down on nowadays, it’s video editing. There was a time when PCs didn’t even come close although specs have improved so much that now many PCs are more powerful in terms of hardware than Macs. However, when it comes to the editing process itself, Macs simply can’t be beaten, especially for beginners.
This is the start of a quick guide to simple editing on your Mac using iMovie on a MacBook. I’ve used both Windows Movie Maker and iMovie and I’m in no doubt that for beginners, iMovie is a much more user-friendly and all round pleasant experience. In particular, iMovie automatically detects the camera model that you’ve connected as well as the frame rate that should be used to save the video – things that you have to do manually in Windows Movie Maker.
The first step in editing a video is to get the footage onto your Mac. MacBooks are equipped with a Firewire 400 port while the MacBook Pro has both a Firewire 400 and 800 port – the difference being the speed at which they can transfer data. For those worried that a MacBook is not sufficient to perform simple video editing however then be assured that they are more than powerful enough to handle it. You only need a MacBook Pro if you’re a serious editor or need to apply special effects and even then, the MacBook can go a long way.
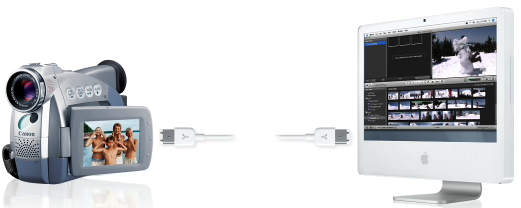
Step 1: Connect your camera to your Mac with a Firewire cable
Step 2: Open iMovie. This may happen automatically depending on your camera type but if it doesn’t, you’ll have to start it manually.
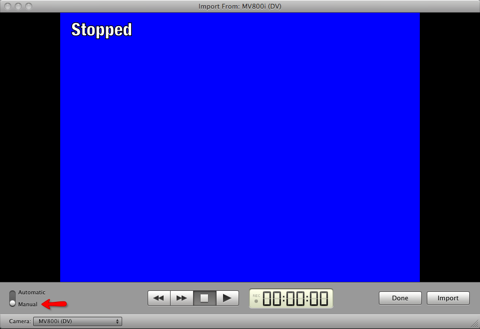
Step 3: Select File – “Import from camera” from the menu. iMovie will automatically detect the camera type you are using (in my case a Canon MV800i).
Step 4: Decide whether to capture manually or automatically. There is a switch to select this. Automatic will rewind the whole tape and save everything in one go. Manual allows you to stop and start the capture using the stop and record buttons as you like.
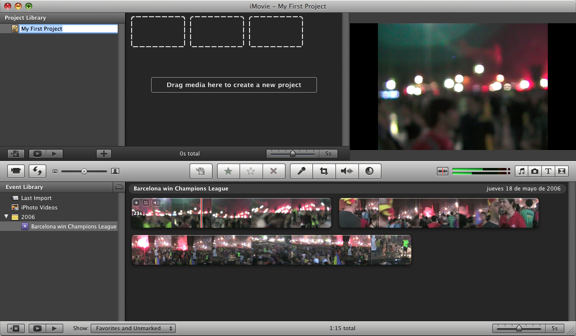
Step 5: Name your project. When you’ve finished capturing, iMovie will generate thumbnails which you’ll be able to use to drag and drop your footage into the timeline and you’re ready for editing.